Types of Jump Ropes for DIY Projects
When it comes to DIY jump rope construction, understanding the different types of jump ropes and materials is key to picking the right one for your project. There are several popular styles commonly used: PVC, leather, beaded, and wire cable ropes. Each has its own pros and cons, especially when you’re building a jump rope yourself.
PVC Jump Ropes
PVC tubing is the most popular choice for homemade jump ropes—and for good reason. It’s durable, flexible, and affordable, making it ideal for beginners and DIY enthusiasts alike.
- Durability: PVC resists wear and tear better than leather or beaded types, lasting longer through frequent use.
- Flexibility: Its slight stiffness allows smooth swings but still offers bounce, which is great for speed and performance training.
- Affordability: PVC is widely available and inexpensive, which helps keep your DIY jump rope project budget-friendly.
Leather Jump Ropes
Leather ropes have a classic look and feel, often preferred by boxing trainers. However, for a DIY jump rope, leather can be tough to work with.
- Pros: Great grip and natural swing; feels heavy and sturdy.
- Cons: Requires proper leatherworking tools; less flexible; can be costly and prone to cracking if not maintained.
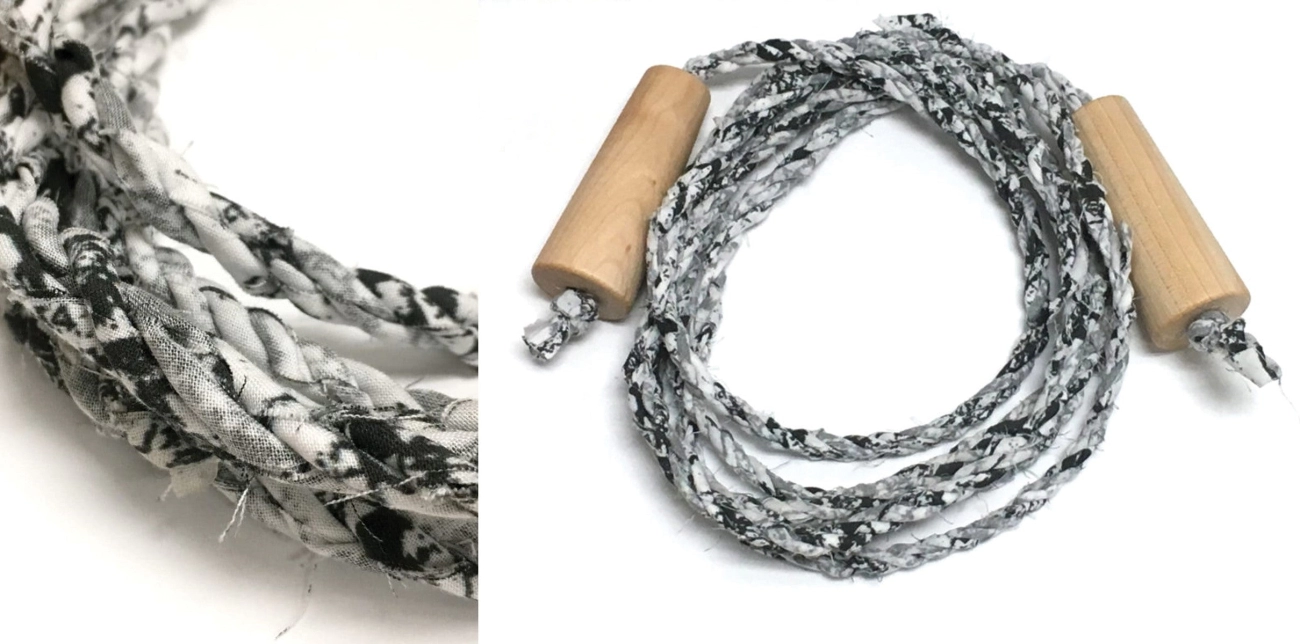
Beaded Jump Ropes
These ropes feature plastic beads strung on a nylon cord, popular for rhythmic jumping and beginners.
- Pros: Audible feedback with clacking beads; easy to see in motion; offers weight for training.
- Cons: Heavier and bulkier; beads can come loose; less ideal for speed training or complex tricks.
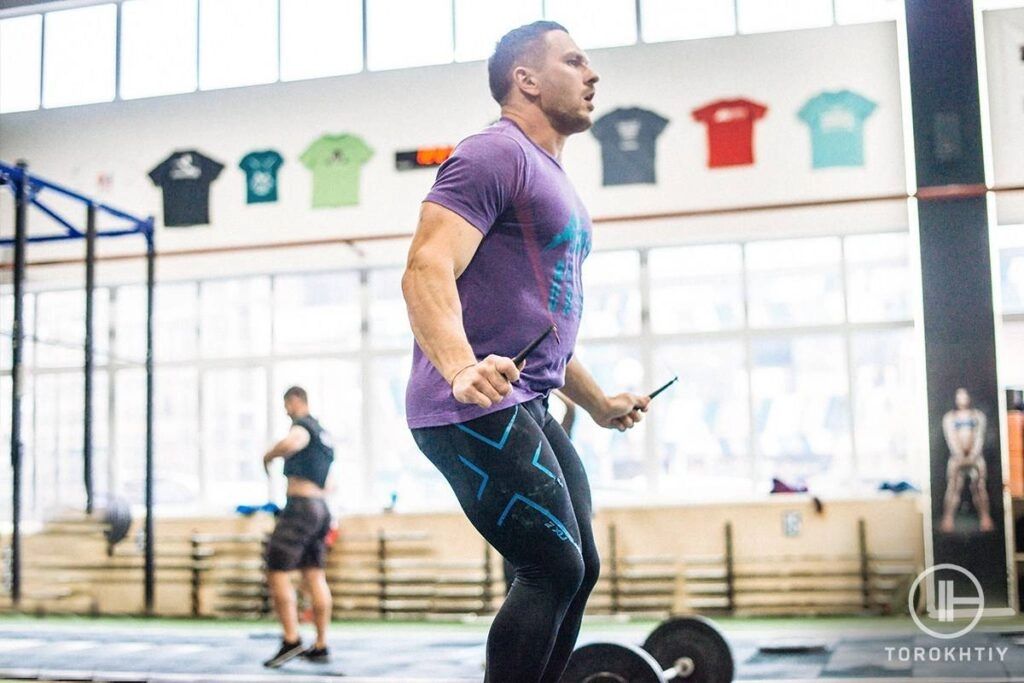
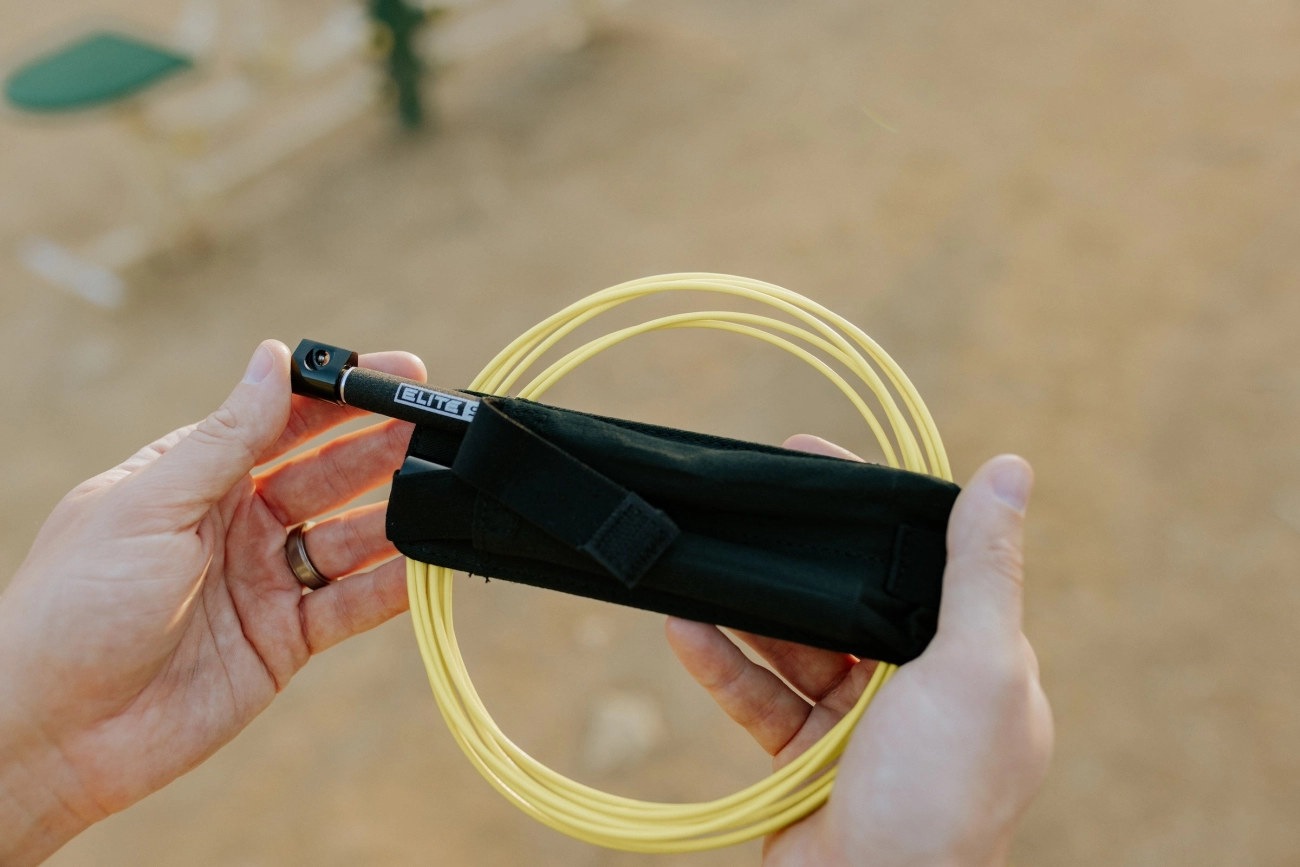
Wire Cable Jump Ropes
Used mostly in professional settings for speed jumping or competitions.
- Pros: Super fast rotation due to lightweight steel cable; durable.
- Cons: Requires strong, secure handles; can be dangerous without protective coatings; less beginner-friendly.
Why PVC Is Perfect for DIY Jump Rope Projects
For most homemade jump ropes, PVC tubing stands out because it strikes the perfect balance:
- Easy to cut and shape with simple tools—no special skills needed.
- Flexible enough to provide smooth swings without tangling.
- Affordable and widely available through suppliers like PVCJumpRope.com offering premium quality tubing.
- Compatible with a range of handle options, including wood and plastic, so you can easily customize your rope.
PVC jump ropes also handle outdoor use well without cracking or degrading, making them a versatile project for both kids and adults.
By choosing the right material, especially PVC for its durability, flexibility, and cost-effectiveness, you set yourself up for a successful, long-lasting DIY jump rope that performs great and looks good too.
Essential Materials Needed to Make a Jump Rope
To create a durable and effective DIY jump rope, gathering the right materials is crucial. Here’s what you’ll need for a quality PVC jump rope construction that lasts.
Materials for Making a Jump Rope
- PVC tubing: This is the core of your rope. Choose flexible, high-quality PVC tubing that can withstand rough usage without cracking or stiffening.
- Wire: For added strength inside the PVC tubing, some DIYers like to insert a thin wire core.
- Handles: These can be made from wood or plastic – both provide a sturdy grip. Plastic handles often come with a nicer finish and can be molded for comfort.
- End caps: These secure the ends of the rope inside the handles, preventing fraying or slipping.
- Bearings (optional): Bearings improve the smooth rotation of handles, reducing friction and allowing faster, more fluid jumps.
Tools Required
- Scissors or a sharp utility knife: For cutting the PVC tubing to length.
- Measuring tape: Accurate measurement is key to getting the right rope length for your height.
- Drill and screwdriver: These come in handy when attaching handles, especially if you’re using end caps or bearings.
- Pliers: Useful for bending or securing wire if you choose to insert it.
Where to Source Quality PVC and Parts
For the best materials, I recommend checking out PVCJumpRope.com. They supply premium PVC tubing for jump ropes, handles, and accessories made specifically for DIY projects. Their materials are known for top-notch durability and flexibility, making them ideal for those serious about homemade jump rope materials.
Ordering from a specialized manufacturer like PVCJumpRope.com ensures you get the right specs that other stores might not offer. Plus, they provide detailed product info to help you pick suitable parts every time. You can explore their full selection and order what you need directly from their shop at https://pvcjumprope.com/shop.
By starting with quality components and the right tools, you’ll save time and avoid frustrations while building your own cheap jump rope DIY—without compromising on durability or performance.
Step by Step Guide How to Make a PVC Jump Rope
Making a durable, flexible PVC jump rope at home is straightforward if you follow these clear steps. This DIY jump rope tutorial focuses on using PVC tubing for jump ropes, combined with quality handles and parts, to create a sturdy and reliable fitness tool customized just for you.
Step 1 Measure the Correct Rope Length
The first and most important step is to measure the jump rope length properly based on your height. Here’s a simple method for a perfect fit:
- Stand on the middle of the rope with one foot.
- Pull the handles straight up along your sides.
- Your handles should reach roughly under your armpits.
- If you’re measuring before cutting PVC tubing, add a couple of extra inches for handle attachment.
Getting the right length ensures comfort and reduces tripping hazards, key jump rope safety tips every DIY jumper should follow.
Step 2 Cut the PVC Tubing to Size
Now that you’ve measured your ideal length, use a sharp pair of scissors or a PVC pipe cutter to cut the tubing precisely. Make sure to:
- Cut straight and clean to avoid rough edges.
- Smooth out any burrs with sandpaper or a file.
- Double-check the length after cutting to confirm it matches your measurement.
This step ensures durable jump rope construction and smooth swinging action.
Step 3 Attach the Handles Securely
Handles can be attached in two common ways: manual fixing or using bearings for smoother rotations.
-
Manual Attachment:
- Insert the ends of your cut PVC tubing into the handle.
- Secure tightly with a strong adhesive or screws.
- This method is cheaper but offers less rotation flexibility.
-
Using Bearings:
- Bearings inside the handles allow the rope to spin smoothly, reducing wrist strain.
- Insert the tubing through the bearing and secure with end caps or screws.
- Bearings add a professional touch and improve rope speed.
Choose the method that fits your budget and intended use. Proper handle fixing prevents issues like loose grips or uneven spinning.
Step 4 Add End Caps and Finishing Touches
Finish your jump rope with end caps or plugs on the PVC tubing ends inside the handles to:
- Protect your hands from sharp edges.
- Prevent the rope from slipping out.
- Improve the overall look for a polished finish.
Optionally, add grips or textured tape on handles for better hold and customize colors to match your style. These final touches are crucial for both jump rope customization ideas and safety.
By following these steps—measuring, cutting, attaching handles, and finishing carefully—you’ll have a top-quality DIY jump rope built for performance and durability. Using the right parts makes all the difference in your homemade jump rope materials.
Tips for Customizing Your Jump Rope to Fit Your Style
Customizing your DIY jump rope can make your workouts more enjoyable and tailored to your needs. Here are some straightforward ideas on jump rope customization that improve both function and looks.
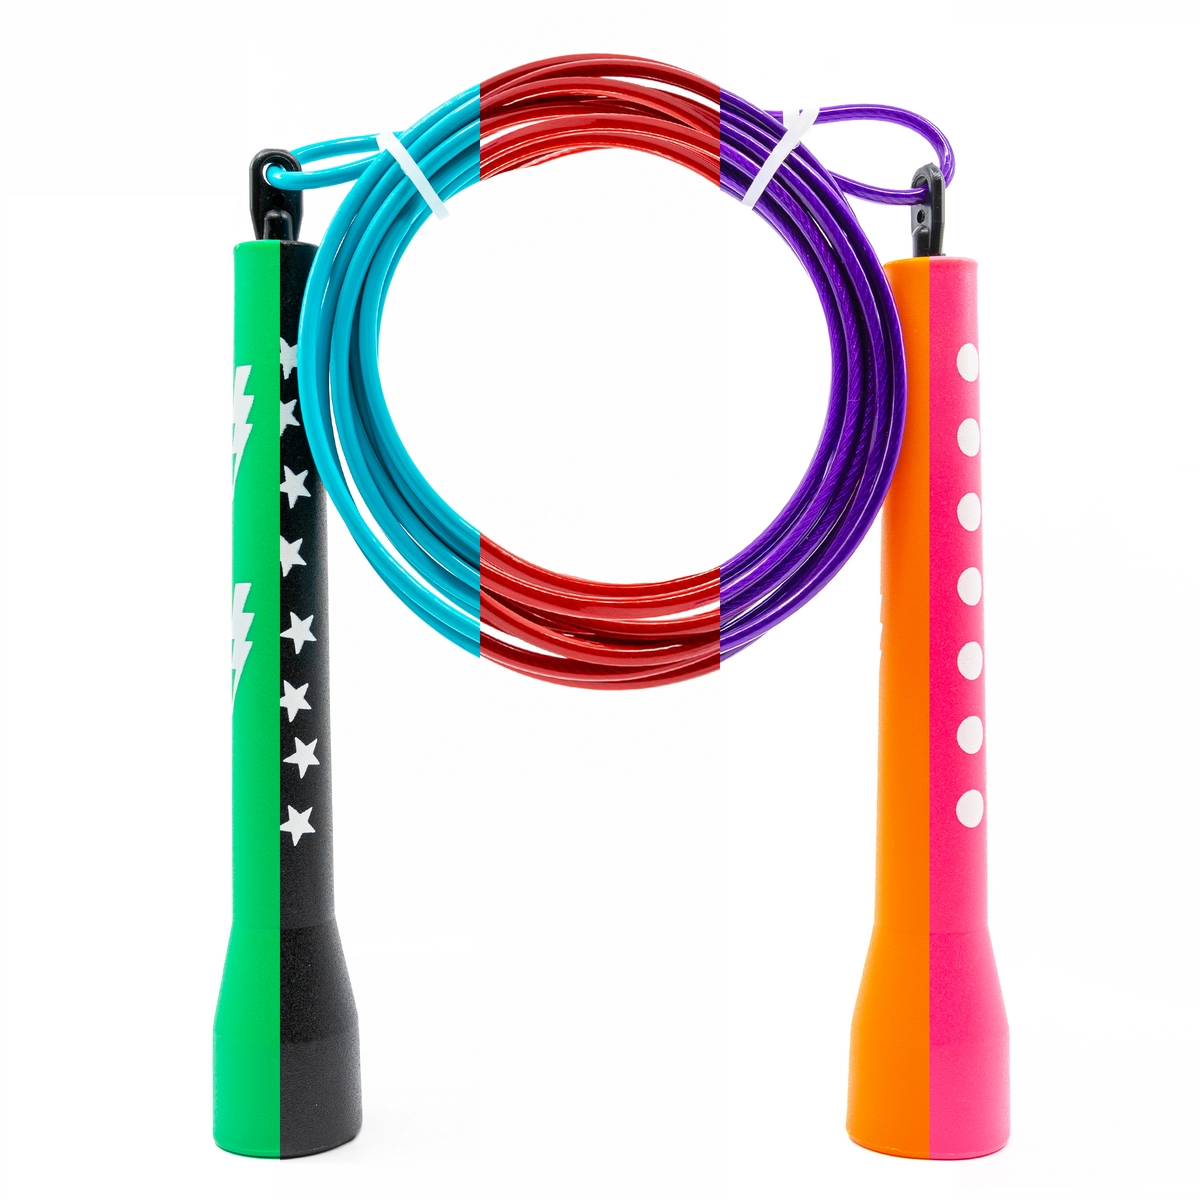
Color Options for PVC Tubing and Handles
- Choose vibrant PVC tubing colors: PVC tubing comes in many colors. Pick your favorite or mix and match for a unique look.
- Paint your handles or tubing: Use spray paint made for plastic or acrylic paint for a custom color scheme. Make sure to seal it with a clear coat to prevent chipping.
- Add decorative tape or heat shrink tubing: Wrap your handles or sections of the rope for extra color and grip.
Handle Grip Modifications for Comfort and Control
- Add foam grips or athletic tape: These provide extra cushioning and reduce hand fatigue during long sessions.
- Wrap handles with silicone or rubber sleeves: This helps with slipping, especially if your hands sweat.
- DIY grips: Use old bicycle handlebar tape or soft fabric strips as an affordable, effective grip upgrade.
Adding Weights for Increased Resistance
- Insert small weights inside the handles: This adds resistance and builds arm strength.
- Attach adjustable weighted beads or rings on the rope: This method lets you customize the weight without changing the whole rope.
- Use weighted PVC tubing: Some specialty PVC ropes incorporate denser materials for natural resistance.
Adjustable Lengths for Versatile Use
- Install adjustable clamps or clips on the rope ends: This allows quick length changes to suit different users or workout types.
- Use handle designs with easy-release mechanisms: Some handles let you swap or shorten the rope fast.
- DIY adjustable system with knots or sliding beads: Simple and cheap, just make sure they won’t slip during use.
Creative Personalization Ideas
- Texture touch ups: Add patterned grip tape or knotted fabric wraps for an interesting feel.
- Engrave or label your handles: Use a wood burner or permanent marker to add initials or workout goals.
- Combine materials: Mix PVC tubing with leather or beaded sections for a custom hybrid appearance.
By applying these jump rope customization ideas, you make sure your rope fits your style, comfort, and workout goals perfectly. This lets you build a durable jump rope that stands out and performs just right.
Maintenance and Safety Tips for DIY Jump Ropes
Keeping your homemade jump rope in good shape isn’t just about making it last longer—it’s also about staying safe during your workouts. Here’s how to maintain your DIY jump rope and avoid common safety issues.
Inspect Your Jump Rope Regularly for Wear and Tear
- Check the PVC tubing for cracks, splits, or any signs of brittleness. Over time, PVC can weaken, especially if exposed to sunlight or moisture.
- Examine the handles and attachments to ensure they are secure. Loose handles can cause accidents.
- Look for fraying or damage around any wired or beaded sections if your jump rope includes them.
- Regular inspections help catch small problems before they cause the rope to break mid-use.
Proper Storage to Extend Lifespan
- Store your jump rope in a cool, dry place away from direct sunlight. Heat and UV rays can degrade PVC tubing over time.
- Avoid wrapping your jump rope too tightly or bending it sharply. This can cause kinks or weaken the tubing.
- Hang your jump rope or coil it gently to maintain the shape and flexibility.
Safety Considerations with Handle Grip and Tripping Hazards
- Make sure the handle grips are comfortable and non-slip. If DIY grips feel rough or loose, consider adding grip tape or foam sleeves to improve control.
- Keep your jump rope area free of obstacles or clutter to reduce the risk of tripping.
- Avoid using your jump rope on overly hard surfaces that can wear down the rope faster and increase injury risk.
- Always ensure the rope length is adjusted correctly for your height to prevent tripping on a rope that’s too long.
By following these maintenance and safety tips for DIY jump ropes, you can keep your homemade rope durable and safe, making every jump count. For more detailed advice on jump rope form and workouts, check out this proper jump rope form guide to make sure you’re training smart and safe.
Common Mistakes to Avoid When Making a Jump Rope
When making your own jump rope, especially using PVC tubing or other DIY jump rope materials, it’s easy to trip up on a few key points. Avoid these common errors to ensure your rope is durable, safe, and performs well.
Incorrect Length Measurements
One of the biggest mistakes in any DIY jump rope tutorial is getting the length wrong. If the rope is too long, it’s hard to control and can cause tripping. Too short, and you’ll be forced to bend awkwardly or cut your workout short.
- Measure based on user height: A simple way is to stand on the middle of the rope and pull the handles up to your armpits.
- Always double-check measurements before cutting the PVC tubing or wire.
- Remember, material flexibility can slightly affect length, so err on the side of a little extra length if unsure.
Poor Handle Attachment
Handles that aren’t firmly attached can make your jump rope unsafe and frustrating to use. Loose or weak attachment points increase the risk of handles slipping or breaking mid-jump.
- Use secure fasteners or bearings designed for jump ropes.
- If you’re using DIY options like screws or glue, make sure they are high quality and appropriate for PVC or your chosen materials.
- Test handle stability before full use, especially if you’re aiming for a durable jump rope construction.
Using Inappropriate Materials Leading to Breakage
Choosing the wrong materials is a big setback in any cheap jump rope DIY project. Some materials won’t hold up to constant use, causing your homemade jump rope to wear out or snap quickly.
- Avoid overly thin or brittle tubing that can crack.
- Skip heavy metal cables unless you have the right tools and skills to handle them safely.
- PVC tubing, especially from trusted sources like PVCJumpRope.com, offers the best balance of durability, flexibility, and affordability for DIY jump ropes.
- Don’t substitute handles or end caps with weak plastics or low-quality wood that won’t last.
By steering clear of these mistakes, you’ll make a jump rope that’s safe, reliable, and fun to use for workouts or play. Double-check every step—especially length, attachment, and materials—to get the most out of your DIY jump rope project.
Why Choose PVCJumpRope.com for Premium Jump Rope Materials
When it comes to making durable, customizable jump ropes, PVCJumpRope.com stands out as a trusted source in the United States market. As a leading PVC jump rope manufacturer and supplier, they specialize in high-quality materials tailored specifically for DIY jump rope projects. Their products meet the demands of both home users and professionals looking for reliable parts.
Quality Materials for Durable Jump Ropes
PVCJumpRope.com offers top-grade PVC tubing, premium handles, and accessories designed to last. Their materials provide the right balance of durability, flexibility, and affordability, making them ideal for homemade jump ropes. You won’t find generic, low-quality parts here — every item is tested to ensure it holds up under regular use.
Customization Options to Fit Your Needs
One of the biggest advantages of PVCJumpRope.com is the ability to customize your order. Whether you need specific lengths of PVC tubing, different handle styles, or special colors, they can accommodate bulk and small orders alike. This flexibility supports a variety of projects, from beginners building their first jump rope to trainers creating branded ropes for clients.
Bulk Orders with Reliable Service
For coaches, gyms, or jump rope instructors needing multiple ropes, PVCJumpRope.com offers competitive pricing on bulk orders without compromising quality. Their streamlined process ensures fast shipping and dependable customer service, helping you stay on schedule.
In , if you want a seamless DIY jump rope building experience backed by durable materials and personalized options, PVCJumpRope.com is a solid partner. Their focus on quality and customer satisfaction makes them a go-to source for anyone serious about creating the best homemade jump ropes.